Migrating data from Amazon S3 to Azure Blob Storage is designed for organizations looking to enhance their data storage capabilities, scalability, and integration within the Azure ecosystem. This guide outlines a seamless process for migrating your data while ensuring security, efficiency, and minimal downtime.
What Does ‘Amazon S3 to Azure Blob Storage Migration’ Look Like?
Amazon S3 is a scalable object storage solution for a wide range of data use cases, while Azure Blob Storage specializes in secure and scalable storage designed to integrate seamlessly with the Microsoft Azure ecosystem. By migrating from Amazon S3 to Azure Blob, organizations can have Azure’s advanced features, including analytics, AI integrations, and cost-effective tiered storage.
Why are Organizations Migrating from Amazon S3 to Azure Blob Storage
1. Scalability:
Both Amazon S3 and Azure Blob Storage are highly scalable, but Azure Blob Storage is well-suited for large-scale data storage and analytics as it supports a maximum capacity of 100 PB per storage account.
2. Integration with Cloud Ecosystem:
Amazon S3 integrates well with the broader Amazon Web Services (AWS) ecosystem, while Azure Blob Storage integrates with the Microsoft cloud ecosystem.
3. Cost-Effective Storage Options:
Both Azure and AWS charge when changing access frequencies. Azure Blob Storage generally offers competitive pricing with tiered access options like hot, cool, and archive tiers, allowing users to optimize costs based on access frequency and retention periods
Prerequisites: What Should You Know Before Starting the Migration Process?
- Access Credentials:
Ensure you have access credentials for both Amazon S3 and your Azure Blob Storage account. - Permissions:
Verify administrative permissions for Amazon S3 buckets and the Azure Blob Storage container. - Choose the Right Migration Tool:
Why Cloudsfer?- Cloudsfer simplifies migration from Amazon S3 to Azure Blob Storage with its intuitive interface, advanced filtering capabilities, and secure data transfer mechanisms.
Step-by-step Process
Step 1: Assess Data Volume in Amazon S3
- Use the AWS Management Console to View Storage Metrics:
- Navigate to the Amazon S3 console.
- Enable S3 Storage Lens to aggregate storage metrics and provide an overview of usage.
- Identify data volume by reviewing metrics such as total storage size, object count, and bucket-level usage.
See more in AWS Documentation
Step 2: Configure Azure Blob Storage
- Set Up Containers:
- Create Blob containers that correspond to the folder structure in Amazon S3.
- Check Storage Availability:
- Ensure adequate storage capacity in your Azure Blob account to handle the incoming data.
- Assign Permissions:
- Use Azure’s Role-Based Access Control (RBAC) to assign appropriate access levels to team members.
Step 3: Set Up ‘Cloudsfer’ as Your Migration Tool
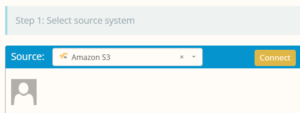
- Connect Amazon S3:
- Log in to Cloudsfer and authenticate your Amazon S3 account as ‘Source’.

- Connect Azure Blob Storage:
- Use Cloudsfer to connect to Azure Blob Storage by selecting it as your ‘Target”.


- Select Data to Migrate:
- Apply filters to transfer only relevant files. Filters include file type, size, and date range.
Step 4: Start the Migration
- Initiate the Migration Process:
- Use Cloudsfer’s dashboard to begin the migration process with just a few clicks.
- Monitor Progress:
- You’ll be able to keep all your updates about migration using Cloudsfer’s progress bar and detailed logs.
- Handle Errors:
- If any issues arise, Cloudsfer highlights errors for quick resolution.
Step 5: Verify Migration
- Validate Data Integrity:
- Verify that all files and folders have been transferred to Azure Blob Storage.
- Test Functionality:
- Check the accessibility of files and confirm that permissions are set correctly.
- Utilize Cloudsfer Support:
- If any files are missing or incomplete, Cloudsfer’s support team is available 24/7 to assist.
Get started today with Cloudsfer