Migrating data from Google Drive to OneDrive involves securely transferring your files to Microsoft’s cloud storage platform. This migration enables businesses and individuals to integrate with Microsoft 365, enhance collaboration, and optimize file management. This guide outlines the necessary steps, prerequisites, and best practices for a smooth transition from Google Drive to OneDrive.
What Does “Google Drive to OneDrive Migration” Look Like?
Google Drive is a widely used cloud storage solution, which offers integration with Google Workspace applications (Docs, Sheets, Slides). In contrast, OneDrive is part of Microsoft 365, providing tight integration with Office tools (Word, Excel, PowerPoint) and advanced enterprise security features.
Migrating from Google Drive to OneDrive allows users to consolidate data within Microsoft’s ecosystem, improving collaboration and access to productivity tools.
Why are Organizations Migrating from Google Drive to OneDrive?
1. Data Management : OneDrive for its storage and integration with Microsoft Teams and SharePoint, while Google Drive offers integration with Google Workspace applications.
2. Security & Compliance : Organizations may prefer OneDrive because it provides data encryption, compliance tools, and access control features that meet the requirements of various industries, including finance, healthcare, and legal sectors.
3. Collaboration & Accessibility : OneDrive supports real-time collaboration and secure sharing within the Microsoft ecosystem, similar to Google Drive’s real-time collaboration features through Google Docs, Sheets, and Slides.
Prerequisites: What Should You Know Before Starting the Migration Process?
Access Credentials
Ensure you have valid OneDrive (Global Admin) access credentials for both Google Drive and OneDrive.
Required Permissions
Verify that you have the necessary permissions to access, transfer, and modify data within both platforms.
Choose the Right Migration Tool
Select a migration tool that supports secure and efficient data transfers from Google Drive to OneDrive.
Why Cloudsfer?
Cloudsfer is a trusted cloud migration tool that supports Google Drive to OneDrive transfers. Its benefits include:
- A user-friendly interface.
- Advanced security features.
- Customizable filters for data selection.
- Efficient and secure migration processes.
Step-by-step Migration Process
Step 1: Assess Data Volume in Google Drive
View Storage Metrics Using Google Drive Interface
- Log in to your Google Drive account.
- Click on the gear icon and select “Settings.”
- Navigate to the “Storage” section to view total storage usage.
- Identify large files or unnecessary data for cleanup before migration.
Step 2: Configure OneDrive
- Set Up Folder Structure
Organize your OneDrive folders to match your Google Drive structure for easier navigation.
- Check Storage Availability
Ensure that your OneDrive subscription has enough space for the transferred data.
- Assign Permissions
If using a business account, set up sharing permissions for team members.
Step 3: Set Up Cloudsfer as the Migration Tool
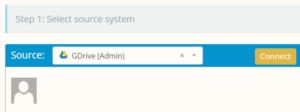
1. Connect Google Drive
- Log in to Cloudsfer.
- Authenticate Google Drive as the ‘Source’.

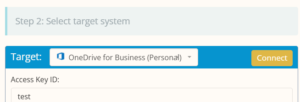
2. Connect OneDrive
- Inside Cloudsfer, select OneDrive as the migration ‘Target’.
- Authorize access to your OneDrive account.

3. Select Data to Migrate
- Use Cloudsfer’s interface to choose which files and folders to transfer.
- Apply filters such as file type, size, or date range to migrate only necessary data.
Step 4: Start the Migration
- Initiate the Migration Process
Start the migration using Cloudsfer’s dashboard with a few simple clicks.
- Monitor Progress
Track the migration status through progress indicators and logs.
- Handle Errors
If any issues occur, Cloudsfer will provide error logs for troubleshooting.
Step 5: Verify Migration
- Validate Data Integrity
After completing the migration, log in to OneDrive to confirm all files and folders have been transferred successfully.
- Test Functionality
Open and review files in OneDrive to ensure they function correctly.
- Check Permissions
Verify that sharing settings and permissions are correctly applied to maintain security and collaboration.