Migrating data from Dropbox to Amazon S3 involves securely transferring your files, folders, and documents between these platforms. This guide walks you through the process, including prerequisites and best practices for a successful migration.
What Does “Dropbox to Amazon S3 Migration” Look Like?
Dropbox is a cloud-based file storage and collaboration platform widely used for personal and team file sharing. Amazon S3, on the other hand, is a highly scalable object storage service suited for data archiving, hosting, and backup.
Why Are Organizations Migrating from Dropbox to Amazon S3?
- Data Scalability: While Dropbox is suitable for smaller team storage with fixed plans, Amazon S3 supports massive data volumes with customizable storage classes, making it more scalable and cost-efficient.
- Advanced Data Management: Dropbox offers file organization and collaboration features, whereas Amazon S3 integrates with AWS services for data analysis, backup, and archival, providing more advanced management capabilities.
- Access Control: Dropbox primarily provides straightforward file and folder permissions for team collaboration, while Amazon S3 uses IAM policies for fine-grained, enterprise-level access control.
Prerequisites: What Should You Know Before Starting the Migration?
Access Credentials:
- Obtain admin-level credentials for both Dropbox and Amazon S3.
Required Permissions:
- Ensure permission to access, download, and manage files on Dropbox and to upload data to Amazon S3.
Choosing the Right Migration Tool:
Opt for a tool that securely transfers large data volumes and maintains file integrity.
Why Use Cloudsfer?
- User-friendly setup for quick migration.
- Advanced security features to protect sensitive files.
- Customizable filters to migrate only selected data.
- Preservation of metadata and permissions during transfer.
Step-by-Step Process
Step 1: Assess Data Volume in Dropbox
- Log in to your Dropbox account and check the storage usage.
- Delete unnecessary or outdated files to minimize data transfer.
- Organize files into folders for easier migration.
Step 2: Prepare Amazon S3 for Migration
- Create a Bucket:
- Go to the S3 console, click “Create Bucket,” and configure settings.
- Set Up Permissions:
- Define bucket policies and IAM roles for secure data management.
- Verify Storage Availability:
- Ensure sufficient space for the incoming data.
Step 3: Set Up Cloudsfer as Your Migration Tool
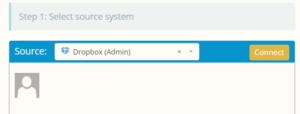
- Connect Dropbox:
-
- Log in to Cloudsfer and select Dropbox as the source.
- Authenticate your Dropbox account.
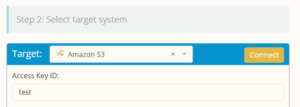
2. Connect Amazon S3:
-
- Choose S3 as the target and enter your AWS credentials.
- Select the bucket where you want to migrate your data.
3. Select Data to Migrate:
-
- Use Cloudsfer’s interface to select the folders and files for migration.
- Apply filters based on file type, size, or last modified date.
Step 4: Start the Migration
- Initiate the Migration:
- Start the process through the Cloudsfer dashboard.
- Monitor Progress:
- Track real-time updates via progress bars and detailed logs.
- Handle Errors:
- If any issues occur, Cloudsfer will provide error logs for troubleshooting.
Step 5: Verify and Finalize the Migration
- Validate Data Integrity:
- Log in to your S3 bucket and verify file consistency.
- Check Permissions:
- Ensure that the correct IAM policies are applied to the migrated data.
- Test Functionality:
- Access and open migrated files to confirm they function correctly.