Migrating data from Dropbox to Box is the process of transferring files and folders between two cloud storage platforms while maintaining data structure, accessibility, and security. This guide walks you through the essential steps, including setup, transfer, and verification, to ensure a smooth and reliable migration.
What Does “Dropbox to Box Migration” Look Like?
Dropbox and Box are both cloud-based content management platforms. While Dropbox is known for its simplicity and user-friendly interface, Box is often chosen for its enterprise-level security features, compliance capabilities, and advanced administrative controls.
Why Are Organizations Migrating from Dropbox to Box?
Security and Compliance
Box supports compliance with major regulations like HIPAA, GDPR, and FedRAMP. While Dropbox can be configured to meet HIPAA standards and offers key compliance features, it generally provides fewer governance and enterprise compliance options compared to Box
Enterprise Administration
Box provides detailed audit logs, DLP support, and user role customization. Dropbox includes admin tools, but Box is often preferred for more complex IT environments.
Collaboration and Integration
While Dropbox integrates well with popular tools like Slack and Zoom, Box provides native integrations with productivity suites such as Microsoft 365 and Google Workspace, along with APIs for deeper customization and workflow automation.
Prerequisites: What Should You Know Before Starting the Migration?
Access Credentials
Ensure you have admin-level credentials for both Dropbox and Box accounts to manage files and settings.
Required Permissions
You need permission to access user files in Dropbox and create folders or upload content to Box. For business accounts, verify that you can impersonate users or use API scopes as needed.
Choose the Right Migration Tool
Selecting a migration platform that supports both Dropbox and Box, can preserve folder structures.
Why Use Cloudsfer?
- Supports direct Dropbox-to-Box migrations.
- Allows selection of specific data and users.
- Preserves timestamps and metadata where applicable.
- Offers encrypted data transfer and migration reports.
Step-by-Step Process
Step 1: Review and Organize Data in Dropbox
- Log in to your Dropbox Admin Console and identify all user folders and shared data.
- Clean up unnecessary or outdated files to reduce transfer volume.
- Note file ownerships and access controls to replicate them in Box.
Step 2: Prepare Your Box Environment
- Set up corresponding folder structures in Box.
- Ensure adequate storage capacity in your Box plan.
- Assign access permissions for users or groups according to your organization’s policy.
Step 3: Configure Cloudsfer as Your Migration Tool
Connect Dropbox
- Log in to Cloudsfer and select Dropbox as your source.
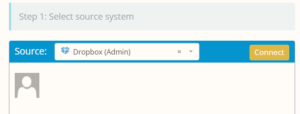
- Authenticate with your admin credentials.
Connect Box
- Choose Box as the target destination.
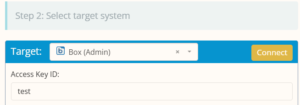
- Authenticate via your Box admin account and grant required permissions.
Select Data to Migrate
- Use Cloudsfer’s interface to select files and folders.
- Apply filters based on file type, size, or last modified date if needed.
Step 4: Start the Migration
Initiate Migration
- Start the process through Cloudsfer’s dashboard.
Monitor Progress
- Track status using indicators and migration logs.
Handle Errors
- If any files fail to transfer, Cloudsfer will log the error and allow retry options.
Step 5: Verify and Finalize the Migration
- Log in to Box and verify that all folders and files have been successfully migrated.
- Test file accessibility and open a few documents to ensure integrity.
- Confirm user permissions and sharing settings match the original Dropbox environment.
Get started here or contact us