Migrating data from Amazon S3 to BIM 360 is about transferring your project files securely and efficiently to enhance collaboration, project management, and data storage capabilities.
This guide will walk you through the migration process, highlighting the steps, prerequisites, and best practices.
What Does “Amazon S3 to BIM 360” Look Like?
Amazon S3 is a versatile object storage service widely used for scalable storage solutions, whereas Autodesk Construction Cloud focuses on managing construction workflows and project collaboration. Migrating from Amazon S3 to BIM 360 is a step of transferring your project files, folders, and data structures to enable construction-specific use cases.
Why are Organizations Migrating from Amazon S3 to BIM 360
Here are some benefits that attract companies to switch their projects to BIM 360
- Streamlined Project Management: Consolidating construction project data into a centralized platform like BIM 360 can potentially improve collaboration and provide more consistent access.
- Functional Integrated Toolsets: Platforms such as BIM 360 often include integrated tools that may enhance document control, issue tracking, and project analytics capabilities, depending on the specific needs of the project.
- Improved Data Accessibility: Here, all your team members can also access the most current project files.
Prerequisites: What Should You Know Before Starting the Migration Process?
Access Credentials
- You have to verify access credentials for both Amazon S3 and BIM 360
Required Permissions
- Confirm that you have administrative permissions for Amazon S3 buckets and BIM 360 projects
Choose the Right Migration Tool
- Why Cloudsfer?
Cloudsfer offers a secure and user-friendly platform for data migration across Amazon S3 and BIM 360. It has an intuitive interface, advanced security, and filtering options that guarantee smooth and efficient migration.
Step-by-step Process
Steps 1: Assess Data Volume in Amazon S3
- Use the AWS Management Console to View Storage Metrics:
- Navigate to the Amazon S3 console.
- On the Buckets page, enable S3 Storage Lens, which aggregates storage metrics and provides an overview of your S3 usage.
- Metrics such as total storage size, object count, and bucket-level usage can help identify the data volume. Metrics are available under the Account Snapshot for quick insights.
See more in AWS Documentation
Step 2: Configure BIM 360
- Set Up Project Structure
- Create folders or destinations in BIM 360 that correspond to your Amazon S3 structure.
- Check Storage Availability
- Ensure there is enough space in BIM 360 to accommodate the migrated data.
- Assign Permissions
- Define access permissions for team members in BIM 360
Step 3: Set Up Cloudsfer as Your Migration Tool
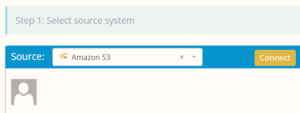
- Connect Amazon S3
- Log in to Cloudsfer and select ‘Amazon S3 as ‘Source’.

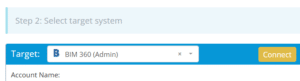
- Connect BIM 360
- Grant Cloudsfer access to BIM 360 by selecting it as a ‘Target’ in the interface.

- Select Data to Migrate
- Use Cloudsfer’s interface to select the files and folders you want to transfer.
- Move only the file types you choose
- You can apply filters such as file types, sizes, or date ranges to migrate only relevant data.
Step 4: Start the Migration
- Initiate the Migration Process
- Start the migration using Cloudsfer’s dashboard, which simplifies the process into a few clicks.
- Monitor Progress
- You’ll be able to keep all your updates about migration using Cloudsfer’s progress bar and detailed logs.
- Handle Errors
- If any issues arise, Cloudsfer will red flag errors for your attention.
Step 5: Verify Migration
- Validate Data Integrity
- After the migration is complete, log in to BIM 360 and verify that all files and folders have been transferred by viewing the reports section.
- Test Functionality
- Open and review files in BIM 360 to confirm they are functioning correctly.
- Check Permissions
- If any files are missing or incomplete, Cloudsfer’s support team is available 24/7 to assist.