Migrating from Azure Blob Storage to Egnyte enables organizations to move from scalable object storage to a collaborative and compliance-driven platform. This guide walks you through the key steps, tools, and best practices for migrating files using Cloudsfer.
What Does “Azure Blob to Egnyte Migration” Involve?
Azure Blob Storage is Microsoft’s cloud-based object storage designed for large-scale data lakes and unstructured data. Egnyte, on the other hand, is a content platform built for file collaboration, security, and governance in hybrid and regulated environments.
Why Do Organizations Move from Azure Blob Storage to Egnyte?
Business Collaboration Needs
Azure Blob is ideal for backend storage, but some organizations need a front-end platform for secure sharing, workflows, and team collaboration. Egnyte is designed with user interfaces and permissions for everyday business users.
Ease of Access
Egnyte offers simple browser and mobile interfaces, while Azure Blob often requires tools or development work to access and manage files efficiently.
Hybrid Environment Support
Egnyte is optimized for hybrid IT models, supporting on-premise and cloud environments for seamless data access and management.
Prerequisites: What You Need Before Starting
- Administrative Access:
Azure account credentials and Egnyte admin permissions.
- Cloudsfer Account:
A valid account is required to facilitate the migration.
- Data Review:
Evaluate what data is relevant for migration; archive or delete outdated files.
- Destination Setup:
Prepare Egnyte folders and user permissions in advance.
Why Use Cloudsfer?
- Connects directly to Azure Blob and Egnyte
- Maintains folder hierarchy and timestamps (when applicable)
- Enables filtering by file type, date, or size, and file version
- Supports encrypted transfers and detailed logs
Step-by-Step Migration Process
Step 1: Review Azure Blob Storage Data
- Log in to the Azure Portal
- Navigate to Blob Storage and review the container structure
- Clean up or archive unused blobs
Step 2: Prepare Egnyte Environment
- Set up corresponding folders in Egnyte
- Check storage limits and access roles
- Assign permissions for team members and destinations
Step 3: Configure Cloudsfer
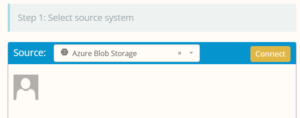
- Connect Azure Blob Storage:
- In Cloudsfer, select Azure Blob as the source
- Enter the container URL, account name, and access keys
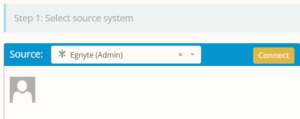
- Connect Egnyte:
- Select Egnyte as the target and authenticate.
- Map Your Migration:
- Align Blob containers to the Egnyte folder structure
Step 4: Customize the Migration
- Use filters to include only necessary files (e.g., by size, type, or date)
- Decide whether to retain the folder hierarchy and metadata
- Choose real-time or scheduled migration
Step 5: Run the Migration
- Initiate migration via the Cloudsfer dashboard
- Track progress and access logs in real time
- Use error recovery tools if issues arise
Step 6: Post-Migration Validation
- Review the migrated content in Egnyte
- Confirm the accuracy of folder structures and permissions
- Test file accessibility and notify users of the new location