Migrating data from BIM 360 to Amazon S3 involves moving project documents, drawings, and related files from Autodesk’s cloud-based construction platform into Amazon’s scalable object storage service. This guide walks you through the process, outlining the necessary steps, tools, and best practices to ensure a secure and efficient transition.
What Does “BIM 360 to Amazon S3 Migration” Look Like?
BIM 360 is a cloud solution built for design and construction management, offering tools for collaboration, file review, issue tracking, and field coordination. Amazon S3 is a general-purpose storage platform used for scalable data archiving, compliance, and integration with enterprise workflows.
This migration typically involves exporting finalized or archived BIM 360 project files and moving them into structured storage in S3.
Why Are Organizations Migrating from BIM 360 to Amazon S3?
- Project Closeout and Archival
BIM 360 manages active construction workflows and collaboration.
S3 is used to store closed project data for future access, legal reference, or audits. - Long-Term Retention and Compliance
BIM 360 is focused on current project management without advanced retention tools. S3 supports lifecycle policies, cold storage options, and compliance-ready configurations.
- Post-Project Analytics and Integration
BIM 360 provides basic reporting and data export, but not full integration with enterprise analytics platforms. S3 integrates with AWS tools (Athena, Redshift, QuickSight) for advanced data analysis.
Prerequisites: What Should You Know Before Starting the Migration?
Access Credentials
Ensure you have administrative access to BIM 360 and AWS (S3).
Required Permissions
You’ll need permission to download/export files from BIM 360 and write/upload to Amazon S3 buckets.
Choose the Right Migration Tool
Why Use Cloudsfer?
Cloudsfer simplifies data transfer from BIM 360 to S3 with:
- Secure platform connectors for both systems
- Filters by file type, size, or modification date
- Metadata preservation options
- Progress tracking and detailed error logs
Step-by-Step Process
Step 1: Assess Data Volume in BIM 360
- Review BIM 360 file structure, folder sizes, and project data
- Identify files for archival or retention
- Clean out unnecessary or duplicate files to reduce migration time
Step 2: Prepare Amazon S3 for Incoming Data
- Set up destination S3 buckets based on the project or organizational structure
- Apply appropriate IAM roles, bucket policies, and access permissions
- Enable encryption, versioning, and lifecycle rules for retention
Step 3: Set Up Cloudsfer as Your Migration Tool
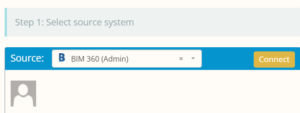
1. Connect BIM 360
- Log in to Cloudsfer and authenticate BIM 360 as your source
- Select folders or project files to migrate
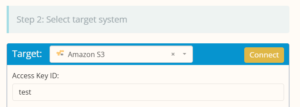
2. Connect Amazon S3
- Add AWS credentials and choose the target bucket
- Define folder paths and structure within S3
3. Select Data to Migrate
- Use Cloudsfer filters to migrate only specific files by type, date, or size
Step 4: Start the Migration
Initiate the Migration
- Launch migration directly from the dashboard
- Choose whether to perform a full migration or a partial/incremental transfer
Monitor Progress
- Track migration through status indicators and logs
- Pause and resume transfers if needed
Handle Errors
- If any issues occur, Cloudsfer will provide error logs for troubleshooting.
Step 5: Verify and Finalize the Migration
- Confirm all files are in S3 and maintain the correct structure
- Check metadata and naming consistency
- Test file access and confirm permissions