Migrating from Egnyte to Amazon S3 involves transferring files from a safe collaboration and governance platform into a scalable, cloud-based object storage system. This guide outlines how to move your data efficiently using Cloudsfer, helping you shift from structured file access to flexible storage infrastructure.
What Does “Egnyte to Amazon S3 Migration” Involve?
Egnyte and Amazon S3 serve different purposes in cloud data management. Egnyte is designed for secure file collaboration, permission control, and compliance across hybrid environments. Amazon S3, on the other hand, offers highly scalable, durable object storage suitable for application data, archiving, and content distribution.
Why Do Organizations Move from Egnyte to Amazon S3?
Platform Focus
Egnyte supports structured file collaboration and governance, while Amazon S3 offers scalable object storage for infrastructure and development use cases.
Storage Strategy
Egnyte is suited for team-based content access and compliance; S3 provides flexible storage tiers for archival and large-scale retention needs.
Integration Needs
Egnyte integrates with business tools like Microsoft 365 and Salesforce, whereas S3 aligns with AWS services for analytics, automation, and cloud-native workflows.
Prerequisites: What You Need Before Starting
- Administrative Access:
Admin credentials for both Egnyte and your AWS account, including IAM permissions for the target bucket.
- Bucket Setup:
Create and configure your destination bucket in S3.
- Cloudsfer Access:
Ensure your Cloudsfer account is active and able to connect both platforms.
Why Use Cloudsfer?
- Supports direct Egnyte to Amazon S3 migration
- Retains folder structure and metadata (where possible)
- Filters by file type, size, or date range
- Safe transfer with encryption
Step-by-Step Migration Process
Step 1: Assess Egnyte Content
- Review your Egnyte directory and permissions
- Identify content to migrate, and clean up outdated files
Step 2: Prepare Amazon S3
- Create a bucket in the AWS console
- Configure permissions via IAM or bucket policies
- Enable versioning or encryption if needed
Step 3: Configure Cloudsfer as Your Migration Tool
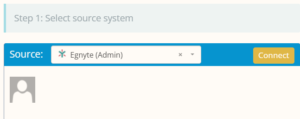
Connect Egnyte
- Log in to Cloudsfer and select Egnyte as the source
- Authenticate with your Egnyte domain and choose the folders to migrate
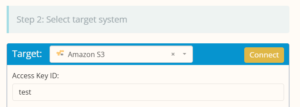
Connect Amazon S3
- Select S3 as the target
- Enter your AWS Access Key, Secret Key, and choose the correct bucket
Customize Migration
- Apply filters for file type, size, or date
- Choose whether to preserve folder hierarchy and metadata
Step 4: Run the Migration
- Initiate the migration from Cloudsfer’s dashboard
- Track status using real-time logs
- Use built-in error reports to retry or adjust if needed
Step 5: Post-Migration Validation
- Log in to the S3 console and verify file presence and structure
- Check metadata if applicable
- Confirm access policies and versioning if enabled
Get started here or contact us