Migrating to Autodesk Construction Cloud (ACC) can be complex and risky without the right tools. But in this guide, you’ll learn how to securely migrate data to Autodesk Construction Cloud using Cloudsfer, (a Gold Technology Partner of Autodesk), with a proven migration platform that supports ACC, BIM 360, and Autodesk Build.
We’ll walk through the exact steps, highlight common mistakes, and show you how to keep your project data safe and intact during the move.
What’s The Challenge When You Migrate To Autodesk Construction Cloud?
Migrating large volumes of construction data is more complex than a simple file transfer. Construction teams work with:
- Project files from BIM 360, file servers, or other cloud platforms
- Collaborative permissions and access control
- Versioned documents and linked drawings
- Tight deadlines and ongoing project updates
Doing this manually often leads to:
- Broken links between project files
- Lost file versions or metadata
- User access issues
- Long cutover windows and downtime
What’s The Safer, Scalable Solution?
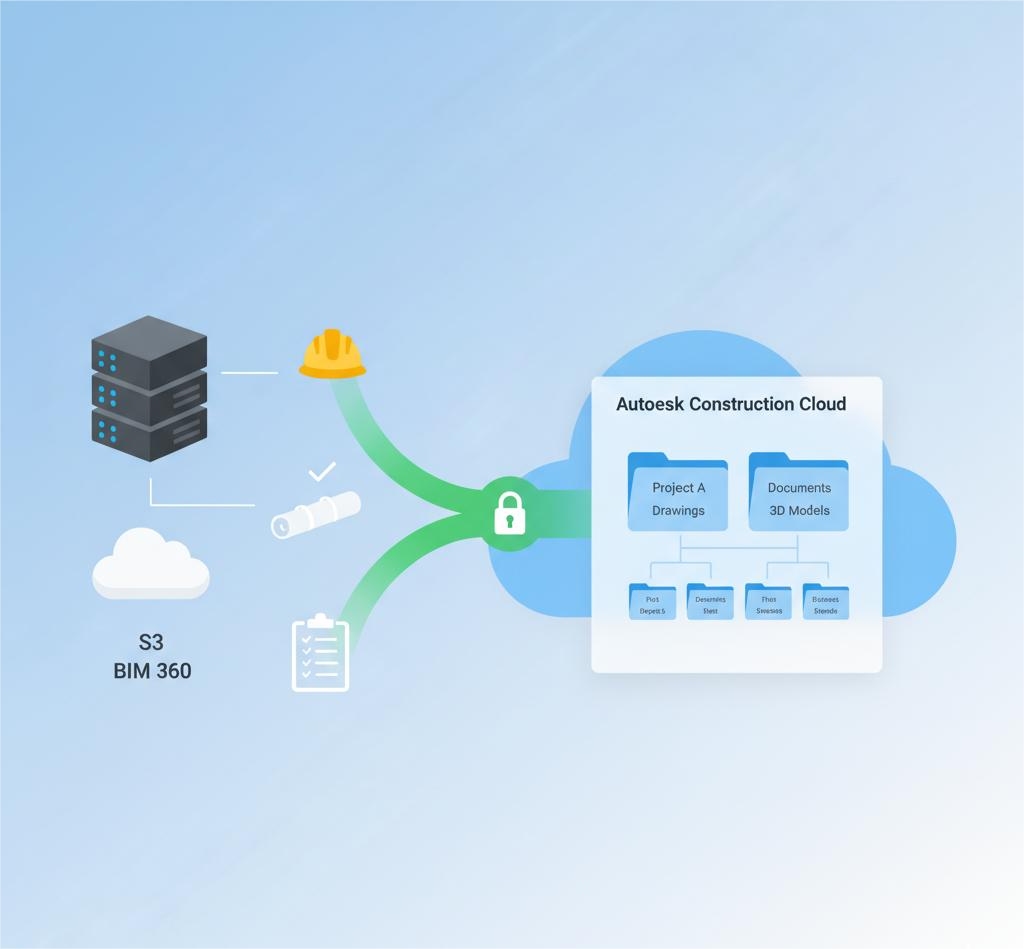
Cloudsfer offers a dedicated integration with Autodesk Construction Cloud, BIM 360, and Autodesk Build that handles cloud migration and backup needs. The platform is designed for construction and architecture teams who need to:
- Migrate data securely
- Preserve project structure, metadata, and permissions
- Handle large volumes
- Perform incremental (delta) migrations
Cloudsfer is a cloud-based solution, with no hardware needed or software to install.
Step-by-Step: How To Migrate To Autodesk Construction Cloud Using Cloudsfer
1. Prepare and assess your source data
Before migrating, list:
- What you want to move (folders, projects)
- Where it currently lives (Amazon S3, file system, cloud drive, etc.)
- Data size and file types
- If the source is still being updated (which will affect the sync strategy)
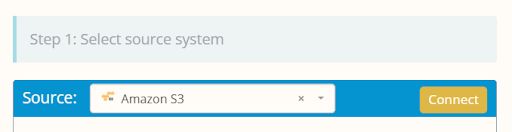
2. Set up your Cloudsfer environment
- Log in to Cloudsfer
- Choose your source system (e.g., Amazon S3, file system, etc.)
- Connect to your BIM 360 as a target
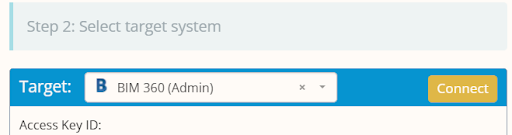
- Authenticate using Autodesk’s secure API token process
- Grant access permissions as needed
Note that Cloudsfer does not store your data or credentials.
3. Plan the migration scope and structure
With Cloudsfer, you can:
- Select entire projects or specific folders/files
- Filter by date, size, or file type
- Migrate active content only
- Create multiple migration tasks simultaneously
You control the structure and order of your migration.
Need help? Contact us right away
4. Run a test migration (Pilot phase)
Before going all-in:
- Choose a small set of representative files or folders
- Run a pilot migration to validate that files transfer successfully to ACC
- Confirm metadata, structure, and access match expectations
This minimizes surprises later.
5. Perform the full migration
Once tested:
- Launch your full migration task(s)
- Monitor progress via the Cloudsfer dashboard
- If you anticipate source data changes during the migration, use delta migration to copy only updated files.
Cloudsfer generates:
- Migration logs
- Transfer reports
- Error reports (for skipped files, access issues, etc.)
These reports give you visibility into what was moved and where.
6. Schedule recurring sync or backup (optional)
Construction teams working in dynamic environments benefit from:
- Delta migration — only changes since the last sync are transferred
- Recurring jobs — schedule syncs daily/weekly/monthly
This ensures no files are left behind after the initial move.
Before & After: What Migration Looks Like With Cloudsfer
| Phase | Manual Migration | With Cloudsfer |
| Setup | IT builds scripts or tools | SaaS portal with direct integrations |
| Metadata | Often lost or misaligned | Preserved (where supported) |
| File Versions | Risk of overwriting or losing history | Version history preserved |
| Access | Needs manual permission reset | Security settings retained |
| Errors | Hard to track or recover | Error reporting and logs |
Common Migration Mistakes to Avoid
Mistake #1: Skipping the test run
- Going all-in without validation increases risk.
- Fix: Run a pilot project first to confirm success.
Mistake #2: Not planning for updates during migration
- Projects are always evolving.
- Fix: Use delta migration to sync new/changed files post-move.
What’s the result after using Cloudsfer?
- You’re live on Autodesk Construction Cloud with all your files and folders intact
- Metadata and permissions are preserved
- Ongoing projects aren’t disrupted
- You have backup schedules and restore options in place
Final Takeaway
Migrating to Autodesk Construction Cloud is a critical step toward better collaboration and project efficiency. But only if done right. Cloudsfer helps construction teams migrate safely, preserve structure and permissions, and avoid costly downtime.
Frequently Asked Questions (FAQ)
- Does Cloudsfer preserve file structure and metadata?
Yes. Folder hierarchy, creation/modification dates, and permissions are preserved where possible.
- Can I perform recurring migrations or backups?
Yes. You can schedule recurring jobs and perform delta (incremental) syncs.
- Is my data safe during transfer?
Yes. All data is encrypted in transit, and Cloudsfer does not store your data.
- Do I need to install anything?
No. Cloudsfer is entirely cloud-based.
- What cloud services does Cloudsfer support for source systems?
Cloudsfer supports 20+ sources, including BIM 360, Box, Dropbox, OneDrive, Google Drive, SharePoint, and more.